Before going ahead to download the Postman, first, let me explain about Postman.
Table of Contents
What is Postman?
Postman is an API testing tool to perform API testing to do functional testing as well as you can use postman to create the API.
Here we talk about the basic installation and a short overview to get started with API testing using Postman tools.
Note: Postman uses the RESTFUL method to perform API testing or make a request to the server. Or You can say it is using the HTTP method to make a response on the server.
Now, Let’s get started with downloading and installing the Postman to your Windows 10 System with 64 Bit OS.
Steps to download and Install the Postman in Windows 10
Prerequisite: Good connection of internet and min 4 GB Ram.
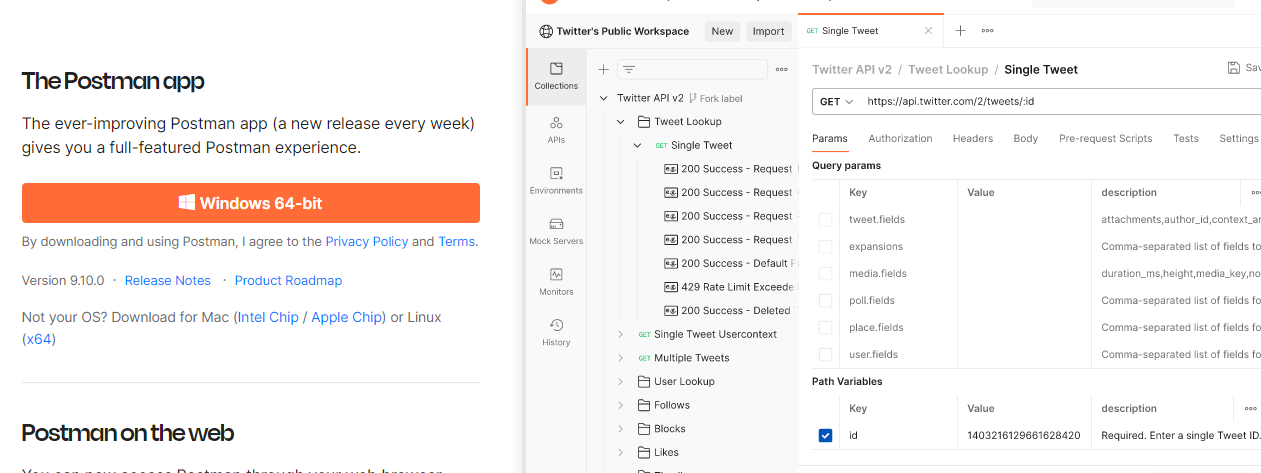
Step 1: Go to the Postman office website while clicking and go to the download page. Or you can click here to go to the official website. For reference please check the below image.

Step 2: Now Click on the Button Windows 64-bit. And wait till the download is completed.
Step 3: Once the download is completed, then open the installation Exe file for the postman.
Step 4: Doble click on the installation setup and wait till the registration page will open.
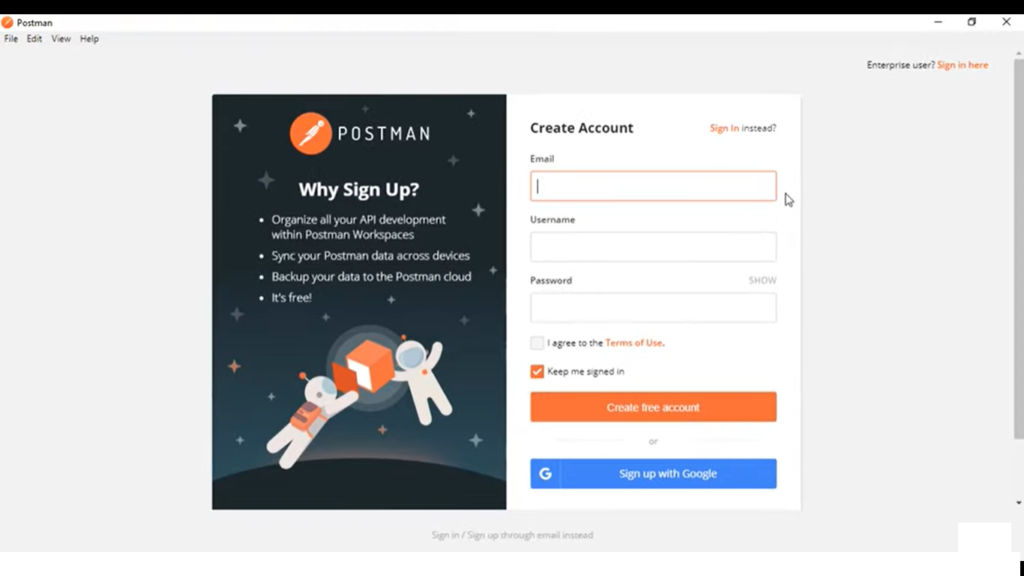
Step 5: Now register with your email or you can go ahead with your Gmail to signup.
Step 6: Enter your details like Name, Your Roles, and Plan to use.
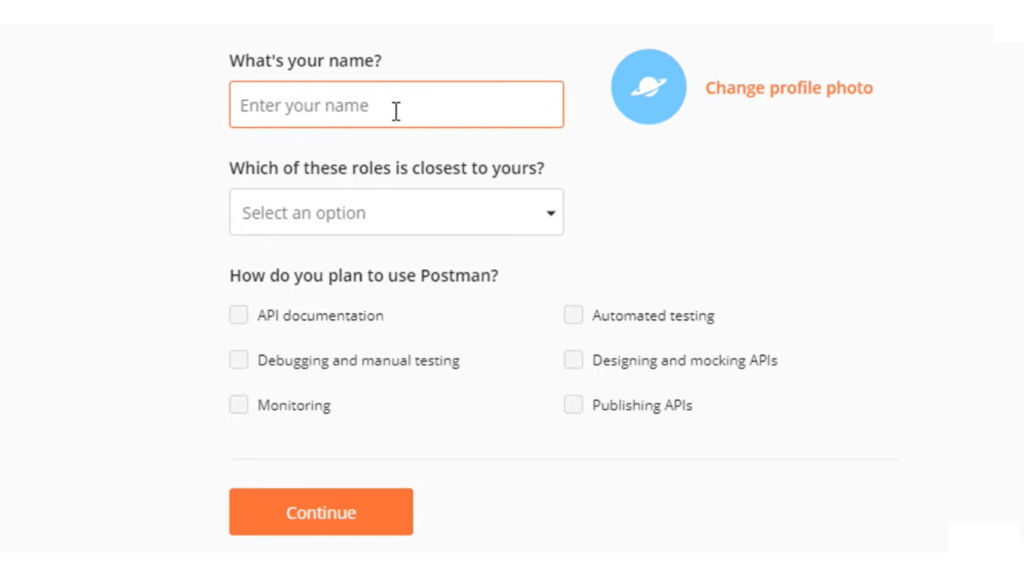
Note: I would suggest selecting all options under How do you plan to use Postman.
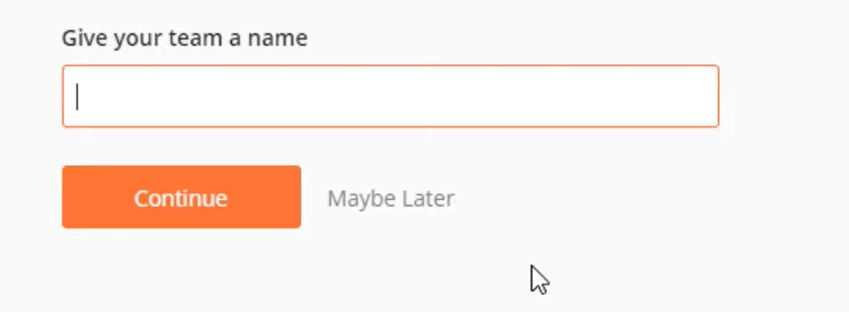
Step 7: Now give your team a name screen will come. You can click on Maybe Later and go ahead.
Note: We are installing for personal use first later on in this content, I’ll explain how to share your project and how to add your teammates to your existing API workspace.
Step 8: Now It will ask to Invite your people and Teams. As of now you just click on Maybe Later and go ahead.
Note: At this point, I’ll explain later on how to collaborate with teams and other people to work together on the same API testing.
Step 9: Now, please check your email once, If you got an email verification link then click on Verify.
Step 10: Once verification is done the browser itself gives you the pop-up to open the Postman tool in your system. Just click on open Postman.
Now, you are all done and ready to perform API testing.
Once it did the screen will look like the below image. It might differ based on the updated version.

Now let’s start with our first API testing. To start that just click on Workspace Menu and then click on Create workspace.
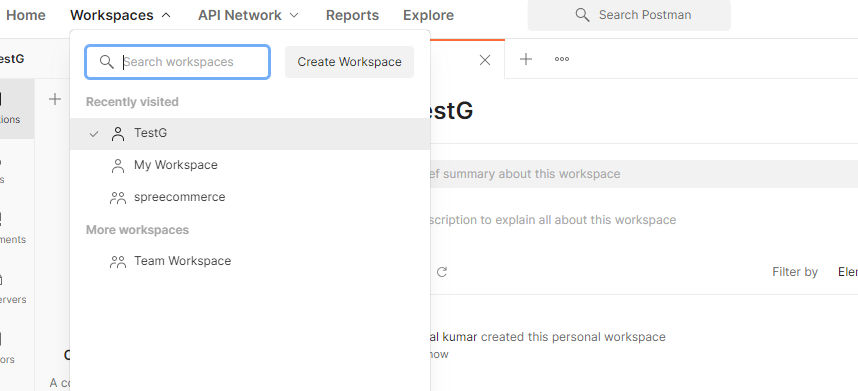
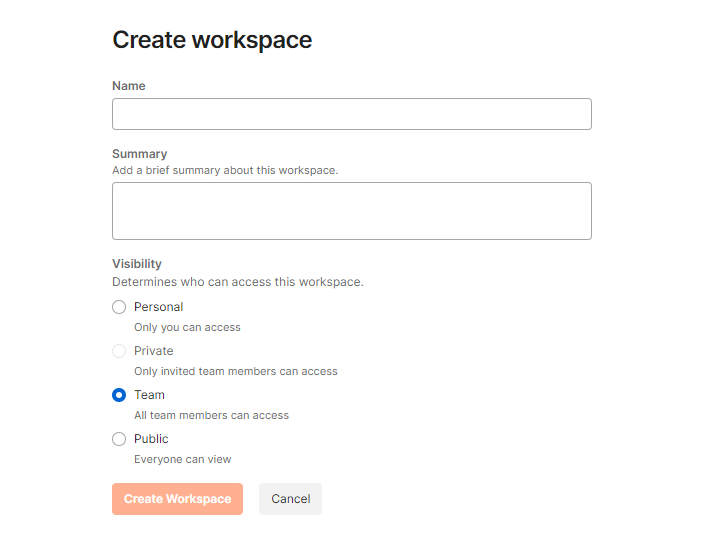
Once you click on Create Workspace then one dialog box will come to create a workspace. Check the below image for your reference.
Create A Collection
Now, Enter your Workspace Name and select your visibility. As of now, you can select Personal for this project. Once you enter the details then click on Create Workspace and it’ll land to that workspace.
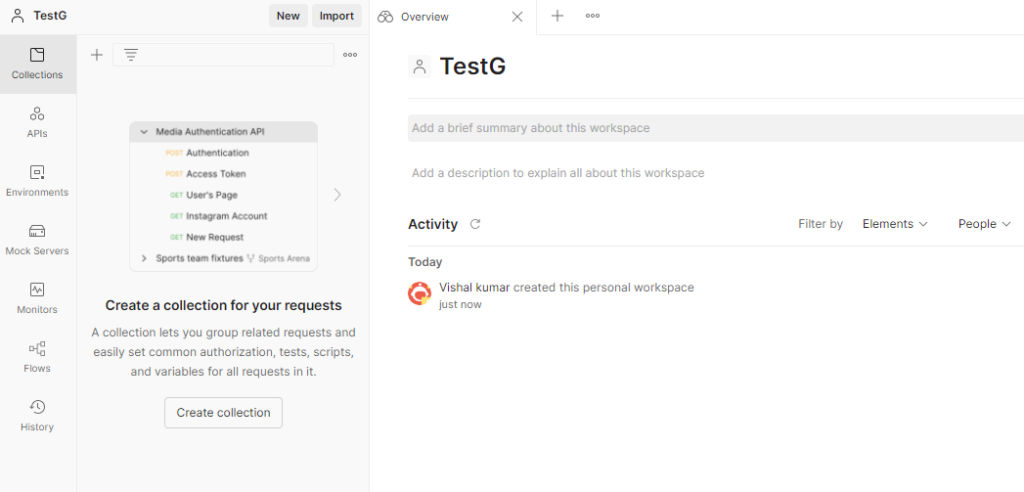
Here, You will be able to see the following menu on the left side. Collectin, APIs, Environments, Mock Servers, Monitors, Flows, and History.
Now, Just click on Collection, And you will see the + icon just adjacent to Collection, Just click on that + icon and it will add one collection. Now give the collection name at your convenience and save (ctl+s). For reference check the below screenshot.
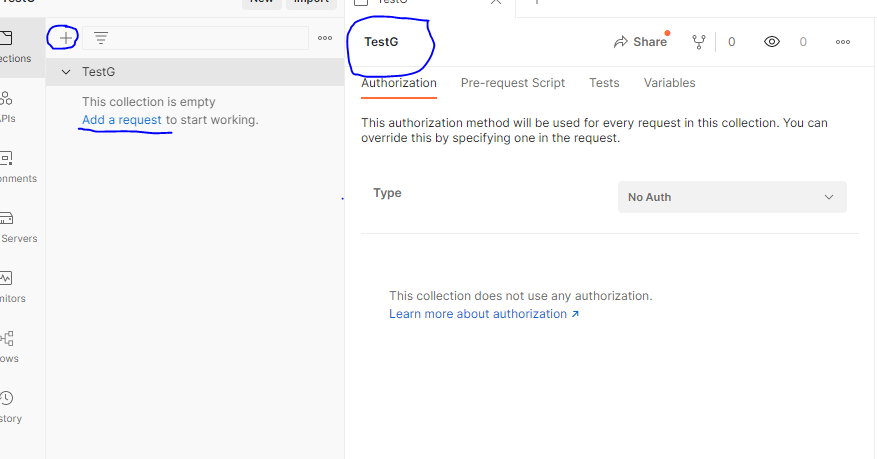
Now, Just Click on the Add a Request, And it will create a new request with HTTP methods. There are multiple methods available on Postman. But Here, I’ll mostly cover CRUD operation methods.
Note: CRUD means: Create, Read, Update, and Delete.
For the CRUD operation, I am going to use the following HTTP methods.
- GET: To read the data we use the GET method.
- POST: To create we use the POST method.
- PUT/PATCH: In order to update existing data we use PUT and PATCH.
- DELETE: To delete data from the server we use the DELETE method.
POSTMAN GET Method:
Now First we are going with GET method. Why GET method first? Because to test API is working or now.
Note: Please go ahead with the API documentation first to understand the product/app to perform the best API testing.
Here I am using an opensource book API that is listed on the postman itself. So please go through this once with this API documentation first at A Simple Book API.
Just click on Add a request and give the name like API Status test etc. For reference please check the below image.
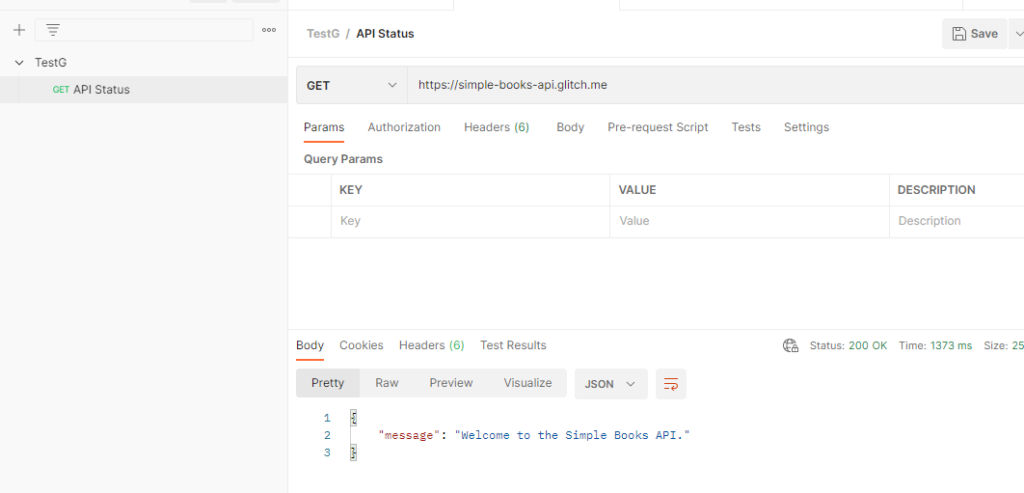 As per the above screen, you will see that, I am making a GET request through postman on this Opensource API. And I am getting the response Body. Here the point that needs to consider or verify is the Status code. If you will get the Status code 200 OK then this API is working else not. According to the response, you will analyze what error is coming. To check more details about Status code details please Status Code Details Description.
Here I am using this simple Book API https://simple-books-api.glitch.me to perform API testing. You can choose any open-source API to test these methods. If you have noticed that there are lots of options available. But in GET method, we don’t require all these.
Point to notice mandatory: Like Method GET, URL/Response URL also known as end URL. The end URL is the source where we are going to make a request from the webserver to get the response.
Second, You have to notice the response the body and status code status at the response section.
Here you will get the response in the form of JSON to have a look below:
In the response body, You will see the response. That response is coming in the format of JSON. JSON stands for JavaScript Object Notation.
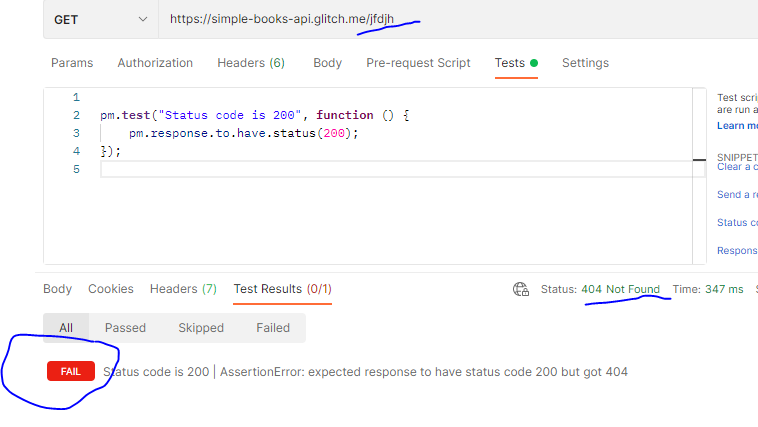
Now, here we are checking manually the status code and then verifying whether it is passed or failed based on the Status code. It is okay if you have fewer requests, but guess if we have multiple requests then how do we check whether my test cases are getting passed or failed.
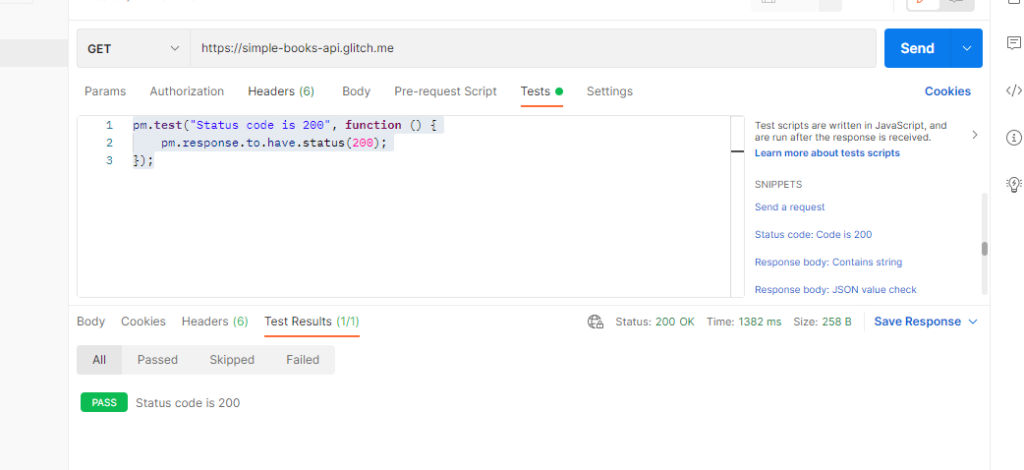
So, now I am talking about the Automation part that helps us to automate and check the result automated. For that, you just go to your Postman toon and go to the Tests section.

As per above the image you can clearly see the test section and Snippets. For automation, if you have basic knowledge of JavaScript then it is very good else it is also good to go.
How to Automate TestCase in Postman
First, go to Tests section. If you are okay with JavaScript coding then you can write your own JS script. If you have don’t have JS knowledge then just go under the Snippets and scroll and find this snippet “Status code: Code is 200” and just click on that link. And the Code snippet will appear on the Tests scripts. For reference, you can check the below snippets.
This content, I’ll keep updating. As of now, I explain only the GET method here. Later on, I’ll keep updating here itself for other methods. So stay in touch with this post. And if you have any queries then put them in the comment section.